Blog Image

a n d r e a s . s c h u t z

Some info on K8056

HOWTO's Posted on Tue, November 20, 2012 17:48:28

Hi!

It’s been a while since I gave myself time to experiment with electronics… Well, now I did some experimenting with Vellemans K8056.

When you have soldered all the components and the hardware is ready, it is easy to test the K8056 using the onboard “Test” button. When pressing the button the eight relays should step through 1 to 8.

After that comes the trickier part…

My idea is to attach this card to either an Android stick such as the CX01 or to a hacked router running OpenWrt. This does it hard to use the Linux and Windows programs written for it. If you want to run the K8056 from a Linux computer the code is accessible here. The implementation is supposed to be online 24-7 in my family summerhouse doing monitoring and automation.

The K8056 card does not reveal a life sign (apart from the power LED) until it receives the right command sequence and it took me some sincere research to find out those secrets.

The manual from Velleman describes the commands but is in this aspect not very clear. For me the confusion was total after a while. Read for your self:

Technical Description

  • Port RS232 is configure with this setting: 2400/8/n/1
  • To control the k8056 card, the correct sequence needs to be send like this:
    • Ascii code 13
    • card address (1..255)
    • Instruction (see below)
    • Address (1..255), relay #(‘1’..’9′) or 0 (for -E|-D|-F commands)
    • checkum, it is the 2-complement of the sum of the 4 previous bytes + 1.
  • Instructions:
    • ‘E’: Emergency stop all cards.
    • ‘D’: Display address of all cards in a binary fashion (LD1:MSB, LD8:LSB)
    • ‘S’: Set a relay, followed by relay # (‘1’..’9′ in ASCII), 9 for all relay.
    • ‘C’: Clear a relay, followed by relay # (‘1’..’9′ in ASCII), 9 for all relay.
    • ‘T’: Toggle a relay, followed by relay # (‘1’..’8′ in ASCII).
    • ‘A’: Change the current address of a card, followed by the address (1..255)
    • ‘F’: Force all cards address to 1 (default)
    • ‘B’: Send a byte, Allows to control the 8 relays in 1 byte (LD1:MSB, LD8:LSB)

Imagine you want to send a command to set all relays on the card with address 1. That would give the following ASCII sequence:

13 1 83 57 102

The ASCII codes 13 & 1 does not have readable representations.

The last digits (102) is a calculated value and have to be the two’s complement sum of the rest. It works like a checksum for the RS232 transmission. First you have to know how to calculate the two’s complement sum. I did not! So if you are like me you’ll be glad to know that it is done like this:

(In decimal now)

checksum = 255-(13+1+83+57)+1

Finally you have to convert the sequence to hexadecimal before you send it. In hex that gives:

0D 01 53 39 66

I don’t know if I am on the right track, but I prepared some files containing raw hex data. In that way i can simply dump those files on the serial interface whenever I want to switch relays on or off thus saving me some scripting in the controlling hosts.

If you should have use of such files, please find them here. They are coded with a card address of one.

My site do not allow me to add .zip files so you have to rename the file to .zip after you have downloaded it. Then you simply unzip the archive.


APN for ZTE Blade II

HOWTO's Posted on Tue, July 03, 2012 22:25:35

So here is another little anoying thing i finally figured out.

My son has got an ZTE Blade II and a Swedish Comviq plan. He has never been able to both surf and use MMS. And if he use the settings that is written on Comviq’s support pages nothing works at all.

I finally worked out what is supposed to be in the APN settings.

First of all, if you have used the ‘reset to defaults’ you have to delete the downloaded APN’s and start by creating your own. I never succeeded in editing the one that downloads from Comviq. Nerver understood why.

Here we go:

Namn: any_name_you_want

APN: internet.tele2.se

Proxy:

Port:

Användarnamn:

Lösenord:

Server:

MMSC: http://mmsc.tele2.se.

MMS-proxy: 130.244.202.30

MMS-port: 8080

MCC: 240

MNC: 07

Autentiseringstyp: PAP

APN-typ: default,mms

I don’t even know what some of the settings mean, but now both internet and mms works.

Hooray.

– EDIT –

After some research I managed to download the upgrade software to his Windows computer (even that worth a howto) and the search for new software revealed an upgrade from GB_P735TV1.0.0B02 to GB_P735TV1.0.0B03. After that upgrade the auto provisioning of the APN’s from Comviq seems to work.


HTC Desire med Telia abonemang

HOWTO's Posted on Fri, January 27, 2012 15:38:20

Jag har sedan ett åt tillbaka en HTC Desire. En bra telefon som lätt utklassade min iPhone som fick gå i arv.

Min nya arbetsgivare har abonnemang från Telia och det ställer till det på sätt och vis. Ett exempel som irriterat mig länge är att Telia blockerar SMTP-trafik. Inte bara port 25 som det verkar, utan all SMTP-trafik.

Min mail har jag hostad hos one.com och deras smtp-server har namnet send.one.com. Telia tillhandahåller en SMTP-proxy som lyssnar till uppslaget smtprelay1.telia.com men den är bara nåbar från insidan.

Detta ger effekten av att om jag ställer in min telefon att använda Telias SMTP-server så kan jag inte maila då jag är på ett WLAN (Telias brandvägg blockerar). Och sätter jag min telefon till att använda send.one.com kan jag inte skicka mail då jag är uppkopplad via 3G (Telia filtrerar bort SMTP-trafik). IRRITERANDE.

Lösningen är att kryptera trafiken så att Telia inte kan se att det rör sig om SMTP-trafik och därför inte kan blockera den. Jag fick kämpa en del för att få min telefon att skicka krypterad mail-trafik via one.com’s SMTP-server och jag tänkte här tala om hur jag bar mig åt för att lyckas.

Först lite fakta:

Då SMTP inte krypteras körs trafiken vanligtvis via port 25.
Då SMTP krypteras kör man vanligtvis trafiken över port 465 eller 587. CISCO snodde åt sig registreringen av port 465 så 587 är väl bäst att använda.
Krypteringen kan ske på två sätt, via SSL och TLS. SSL är på väg att utrangeras.
För att undvika blockerade portar hos illasinnade internetleverantörer så har de flesta mail-leverantörer hittat på lite olika portar på sina SMTP-servrar. One.com tex. har port 2525 på sin SMTP-server och det lurar många internetleverantörer fast inte då telia som dessutom tycks titta på vad din datatrafik innehåller.

Till sist lösningen:

SMTP-servern hos one.com kan kommandot STARTTLS som redan innan autentiseringen slår på TLS-krypteringen på den annars okrypterade porten 2525. Snyggt! Men inte särskilt bra dokumenterat hos dem. Så gott som alla manualer på deras hemsida säger bara att du inte skall köra med SSL. Det är i och för sig sant, send.one.com tillåter ingen SSL-kryptering på utgående mail vilket gör att iPhone tex. gnäller om att få slå av kryptering.

Kan det vara en slump att Telia och Apple samarbetar?

Praktisk gör du så här på din HTC Desire:

* Starta mailapplikationen, tryck meny-knappen, välj “Mer” sedan “Kontoinställningar”.
* Välj “kontoinställningar” igen i det nya fönstret som visas så att du kommer in i wizarden för “Redigera konton”.
* Skriv in din mailaddress, tryck sedan på fortsätt.
* Den sida som visas nu är inställningarna för inkommande mailserver.

* Nästa sida är inställningarna för utgående mailserver.
* På sista sidan får du frågor om “Kontonamn” och “Ditt namn” fyll i dem och tryck “Avsluta inställning”.
* Nu hoppar telefonen tillbaka till sidan för kontoinställningar. En ful liten ovana som HTC Desire har är att den ställer tillbaka inställningarna under “Skicka och ta emot” så dom måste du ange till vad du tycker är bra igen.

Hoppas det här hjälpte och ursäkta de suddiga bilderna.


Can plastic boats rot?

HOWTO's Posted on Wed, June 01, 2011 08:12:23

My father and I bought a Crescent 465. We wanted a small, portable boat for fishing and short trips in the lakes and sea nearby. We settled for the 465 model because it is sturdy enough and good value for the money. So we scanned the market on second hand 465’s and found one that we liked.

Today, I know what we did wrong. Usually we don’t dive into matters without precautions and don’t ask me why we did it this time. Eager at best, but pretty stupid when given enough time to think.

First we should have searched the net for problems on the Crescent 465. If you google the model along with the word “problem”, you know what I talk about. We surely aren’t the first ones to encounter this.

But here we are. Proud owners of a Crescent 465!!!

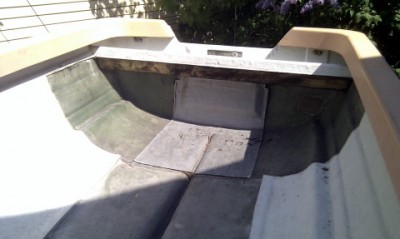
All the woodwork in the boat was thoroughly rotten. Wich in turn made the boat unstable and a potential hazard to use in water. Everything had to be changed.

So. You have been warned. Do your homework before buying a 465 or you’ll end up doing this:

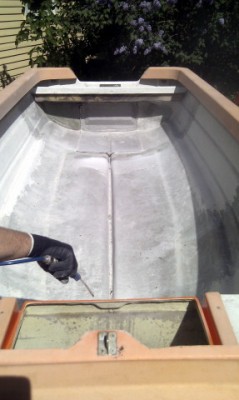
First, cut away all the rotten wood. We used a grinder to carefully cut out the interior as close to the hull as possible. Careful not to damage the hull itself.

We also decided to reuse the cut out parts as much as possible. So we removed them as intact as possible.


We used an axe, a sledge hammer and a small crowbar to break away the residual edges. It worked extreamly well and was very efficient.


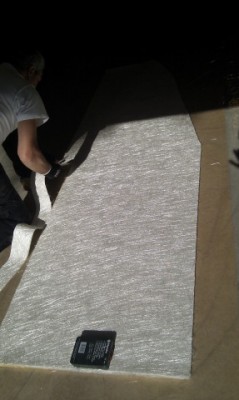
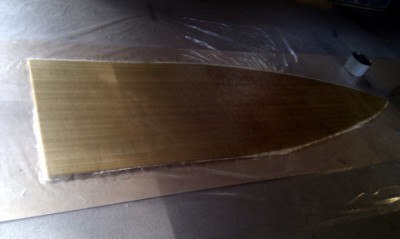
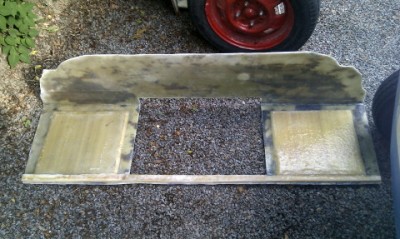
Then, we made a new floor (durk in Swedish) from polyester, fibreglass and divinycell. We put two layers of polyester and fibreglass on each side.


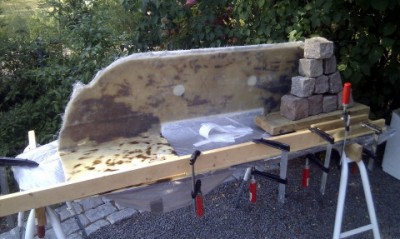
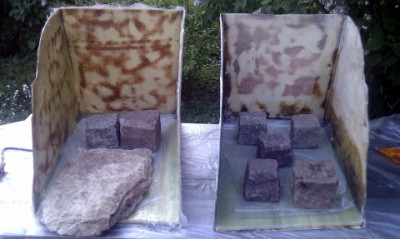
We grinded away all the rotten plywood that was inside the benches and put new layers of fibreglass and polyester inside. The upper part of the benches where reinforced with 10mm divinycell creating a sandwich construction. We hope it will be strong enough.


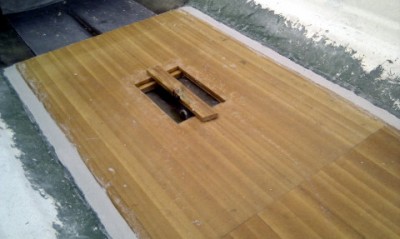
We made supports on the underside of the floor to help carry the weight and help in keeping the floor attached to the hull. We straighted up the hull carefully before fastening the floor. Without the floor the hull is pretty easy to bend and skew.

Then we fastened the floor with sikaflex. Sikaflex is a polyuretan glue with superb adhesive. The marine variant is resist to water.

We made a light weight filler from polyester and micro glass balloons. We used the filler to smooth out all gaps.


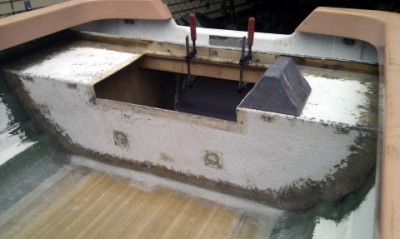
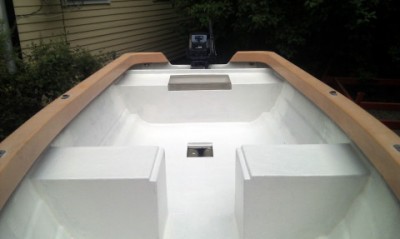
When the floor was in place all other interior was laminated in. Almost all wood is now removed from the construction and very little can rot. Everything is made using the sandwich technique with fibreglass, polyester and divinycell.


Finally we topcoated the interior. We where surprised on the final finish and look. The topcoat was incredibly forgiving in covering minor errors and gave a very professional look.

Last but not least we attached the hatches and put new locks on them. Voila!

We put a lot of time in this project. Far more time and money was spent in repairing this boat than we could ever have believed from the beginnig. But this is still a rather cheap way of getting a boat. Looking back we are pleased with the experience of laminating in polyester. It is easy to get the hang of it and if you don’t achieve what you want the first time, cut away and redo until you are satisfied with the result. Good luck!


… fix your pressure switch

HOWTO's Posted on Thu, September 04, 2008 15:51:43

One day my water filter started to leak. Strange i thought, but i tightened it, and gave the problem very little attention. Half an hour later the filter was cracked and my cellar floor full with water.

After inspecting the filter I started to suspect that it had burst from over pressure. The pump had been running all the time and it still was. Checking the gauger on the holding tank reviled that i had almost 10 Bar in my tank.
Now there was something very wrong with this. I emergency repaired the filter and connected the water hoses together again. I used the ordinary garden tap to lower the pressure and then manually switched on and off the power to my pump. No matter the pressure, the pump was engaged.

Now I was suspecting the pressure switch. And there I found the problem. The switch was stuck in the on position, no matter the pressure.

Blog ImageThe pressure switch I have is shown above. It is pretty new and if I remember right it was one of the better when I bought it. The idea of repairing emerged.

As you can see it is very easy to unscrew the switch from the pipe. Just don’t forget to switch off the water from the holding tank and the rest of the house.

Blog ImageI took the plastic cover off and unscrew the switch from the pipe. As you can see there is a rubber gasket keeping the water from the mechanics/electronics. Immediately when I unscrew the switch I could see that debris had build up inside the passages inside the switch.
Blog ImageI unscrew the small screws holding the “wet” side in place and found that everything else looked nice and clean. Almost as new.
Blog ImageThe part that came off looked like this. Please note the two metal parts. They are not fastened in any way and will probably fall out when you disconnect the two pieces of the switch. Any way this is how they are placed inside the switch.
Blog Image Blog Image Now take good care of the two metal parts, you will need them when you reassemble the switch again. Peel of the rubber gasket and voila, that is where all the dirt is hiding. In my switch I had more than 5 millimeters of chalk and debris. And it is smelly!
Blog ImageThis is how it should look. No smelly, sticky stuff. And free passage for the water. My gasket was in very good shape, so I did not change it. If your gasket is showing wear and/or cracks, this is a very good time to change it into a new one to prevent future disasters.
And thats it! Now you can reverse the disassemble and assemble it all again. Use new sealing tape and give things an extra thought before mounting everything. Remember to be careful and exact.
And also remember that you just saved yourself one hundred bucks.


« Previous